Mount Baldy (San Antonio) via Baldy Bowl
A high-elevation summit loop with steep climbs, exposed ridgelines, and expansive views from the highest peak in the San Gabriels
11 mi
Distance
3990 ft
Elevation Gain
7.5 hrs
Duration
Difficulty
San Gabriel Mountains
Location
Trail Snapshot
Location: San Gabriel Mountains - Manker Flat
Trail Type: Loop
Starting Elevation: 6,000
Peak Elevation: 10,064
Best Time to Go: Summer
Access & Rules
Land Agency: US Forest Service
Permit: Required
Permit Details: USFS Adventure Pass or America The Beautiful Interagency
Dogs: yes
Overview
Mount Baldy is a different kind of hike. From the start, you’re aware that this is a high-elevation, full-day effort, and the mountain demands a steady, prepared approach.
This route, done clockwise, takes you up the quieter backside of the mountain before bringing you across the exposed ridgeline of Devil’s Backbone on the descent. It’s a more complete experience of the mountain—less crowded on the ascent, more expansive on the return.
This hike is for those ready to push a bit further. The reward is not just the summit, but the sense of space, scale, and exposure that builds as you move higher into the alpine environment.
Who This Trail Is For
✓
Experienced hikers ready for a sustained, high-elevation effort
✓
People training for alpine or multi-day mountain adventures
✓
Those comfortable with exposure, loose terrain, and long climbs
✓
Anyone looking for a true summit experience in Southern California
Who This Trail May Not Be For
✓
Novice hikers without strong navigation skills
✓
People who are sensitive to higher altitudes
✓
Hikers not physically prepared for a steep and demanding ascent and long hiking day
✓
Hikers who are looking for a shorter more moderate trail
Trail Map
Trail Details
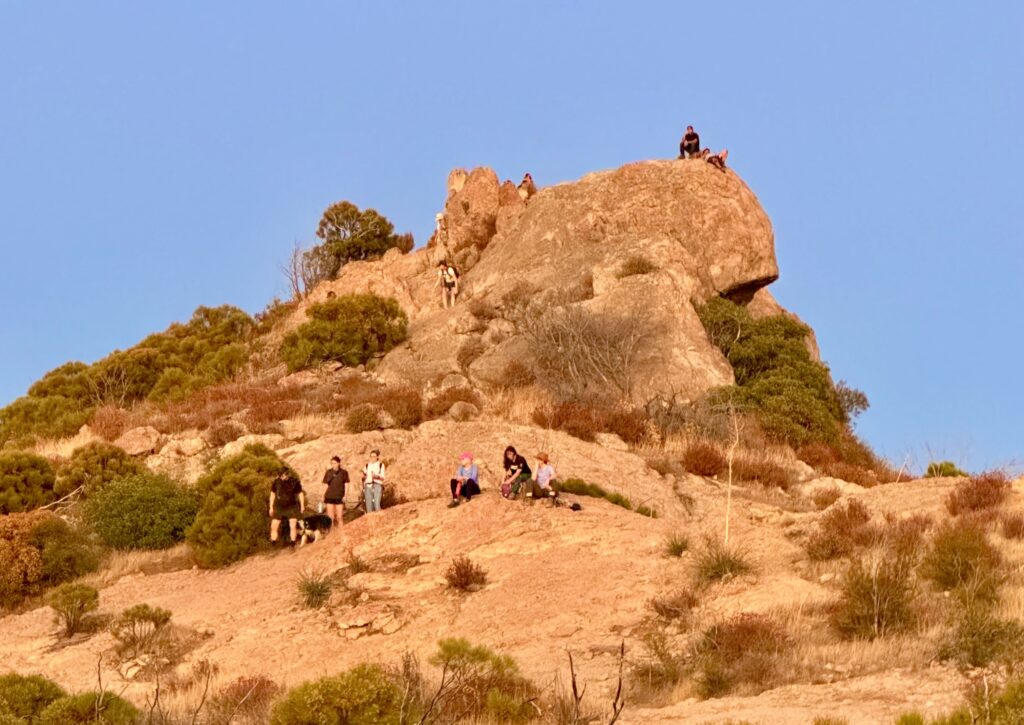
The hike begins at Manker Flat (~6,100 ft), already at a higher elevation than most hikes in Southern California. From here, you’ll follow the fire road briefly before branching off toward the Baldy Bowl / Ski Hut Trail area, beginning your clockwise ascent up the backside of the mountain.
Early on, the trail moves through forested sections with hardy, wind-shaped pines, some of them old and twisted from years of exposure to the elements. These trees become more sparse as you gain elevation, gradually giving way to more open terrain.
The climb is steady and demanding. You’ll encounter long stretches of steep ascent and loose talus, requiring careful footing and consistent effort. As you move higher, the air becomes thinner and the temperature noticeably cooler. The final portion of the ascent—roughly the last 2–3 miles—is fully exposed, with expansive views opening in every direction. This is where the scale of the mountain really sets in.
At the summit of Mount Baldy (10,064 ft), you’re standing at the highest point in the San Gabriel Mountains. The environment is often windy and significantly colder, even in summer, with wide, uninterrupted views across Southern California. From the summit, the route transitions onto Devil’s Backbone, a narrow ridgeline that provides one of the most scenic and exposed sections of the hike. The descent continues along this ridge before dropping toward the Baldy Notch ski area.
From the ski area, the final stretch follows a wide, gradual fire road back to Manker Flat, giving your legs a chance to recover after the steep descent.
Pro Tips
✓
Hike this loop clockwise—a quieter ascent and a more scenic descent across Devil’s Backbone
✓
Start early—this is a full-day effort and conditions change quickly in the afternoon
✓
Hiking poles are a must for both the steep ascent and the loose, gravel-covered descent
✓
Wear proper hiking boots with solid tread—this trail has extended sections of loose “kitty litter” terrain
✓
Bring layers—the summit is often cold and windy year-round
✓
This hike is best done with a guide or with prior high-elevation / mountaineering experience
What to Bring
✓
3 liters of water and electrolytes
✓
Snacks and lunch, pack more calories than you think you need
✓
Hiking Poles strongly recommended especially for loose gravel on the descent
✓
Extra Layers as the summit will be cold and windy even in the summer.
✓
Sun Protection: Hat, sunglasses, sunscreen, and protective clothing
✓
If hiking in the fall or spring be sure you are prepared for icy sections on the trail
✓
Reliable navigation gear is essential, paper map and compass for a back up, backup battery for phones, and a satellite emergency beacon
Safety Tips
✓
This hike is best done with a guide or with prior high-elevation / mountaineering experience
This trail guide is provided for informational purposes only. Hiking involves inherent risks, including changing conditions, terrain hazards, and navigation challenges. You are responsible for your own safety, preparation, and decision-making on the trail. Always assess your abilities, come properly equipped, and use your own judgment. If you’re unsure, consider joining a guided hike for additional support and safety.
Want more support on the trail?
Join our guided hikes for extra confidence, community, and support.
What People Are Saying
A few words from hikers who have joined us on the trail.
I had been a little nervous about joining because I didn’t know anyone, but the group felt warm and welcoming… Read more “”
Sarah M.
There are no words that fully describe what this experience gave me. It combined movement, reflection, connection, and nature in… Read more “”
Ariel R.
What surprised me most was how quickly strangers became friends. The hikes felt organized, relaxed, and genuinely welcoming.
Rachel D.
More Trails to Explore
Keep exploring with a few hand-picked trails that pair well with this route.